Rain Barrel Workshops and Resources

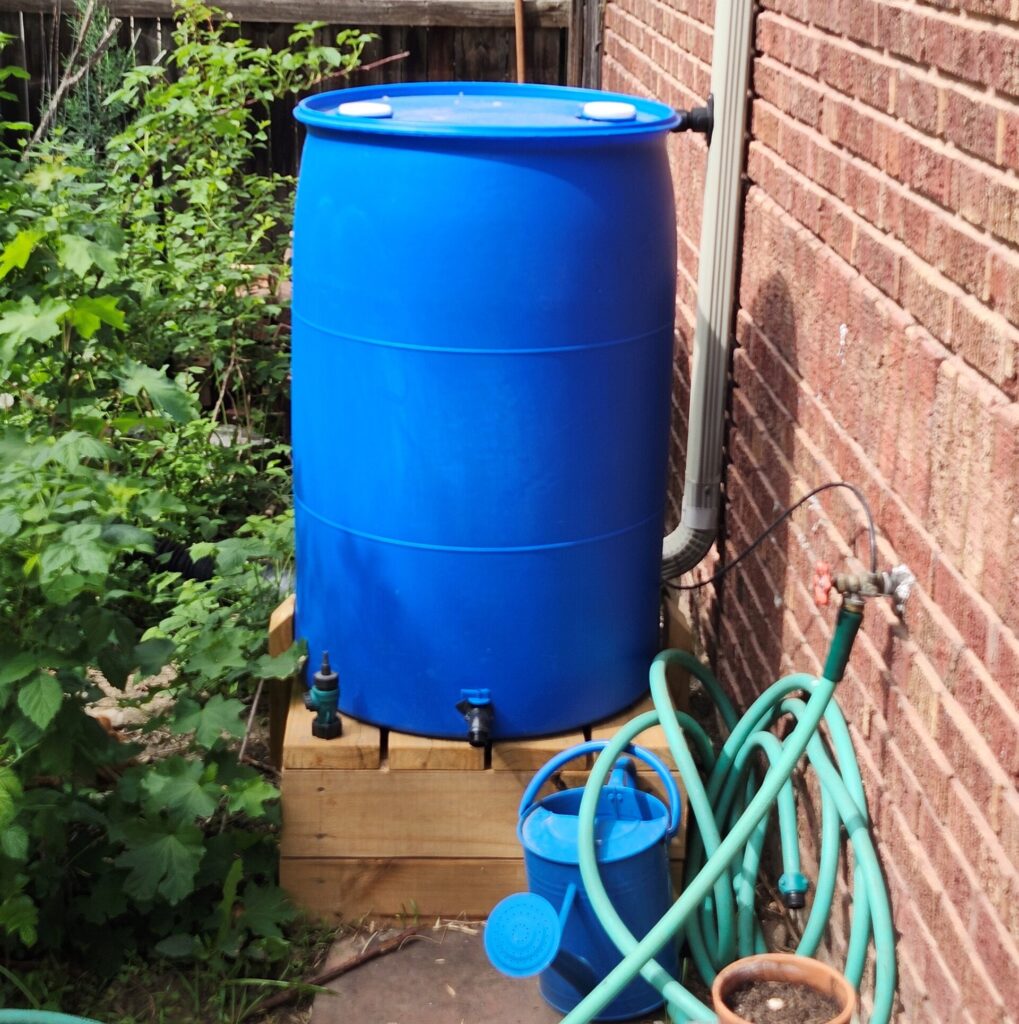
A blue rain barrel sits on a wooden base, connected to the downspout of the home via a black hose.

In-person workshops

In-person workshops have concluded for Spring 2025. To stay up to date on future rain barrel workshop opportunities, fill out the Rain Barrel Interest Form.

Rain Barrel Resources 

We have started compiling resources to help you choose, install, and maintain your own rain barrel on this webpage. We will continue to update this webpage with more information. You can also check out the Colorado Stormwater Center – see all of their rain barrel information and resources on their website: Rain Barrels – Colorado Stormwater Center.
Interest Form

Can’t attend a rain barrel workshop right, now but interested in attending one in the future? Please fill out the Rain Barrel Interest Form to help inform future rain barrel workshops and rebate opportunities.

Frequently Asked Questions (FAQ)

How do rain barrels conserve water?

Rain barrels conserve water by collecting rainwater that would otherwise run off your roof and into storm drains, allowing you to store and reuse this captured water to irrigate your lawn and garden, essentially providing a free source of water that reduces your use of and reliance on municipal water supply.

To actually conserve water and reduce your overall municipal water use, it is important that you adjust your current irrigation schedule and replace it with water from your rain barrel:

  • Adjust your irrigation schedule: reduce the amount of water (length of cycle or number of cycles), or remove a day from your watering schedule, and replace with rain barrel water.
  • Use your water rain barrel to water a NEW garden, tree, or other planting instead of adding an additional drip line or sprinkler.

How do rain barrels protect water quality?

Collecting rainwater keeps it from becoming stormwater runoff that can pick up pollutants as it flows to the nearest storm drain and instead puts this precious resource to good use. Stormwater pollution occurs when runoff collects trash, pet waste, chemicals, and other pollutants as it flows through our community. Stormwater ends up directly in local waterways – it is never cleaned or treated.

Is collecting rainwater legal in Colorado?

Collecting rainwater is legal in Colorado. Rainwater harvesting was legalized in Colorado in 2016 with some restrictions: the water can be used for outdoor use only, and single-family residences or multi-family residences (4 or fewer units) can only install 2 barrels with a combined maximum storage of 110 gallons.

I live in a community with a homeowners association, can I install a rain barrel?

Homeowners associations (HOAs) cannot prevent you from getting a rain barrel, but they may have aesthetic or location requirements. Talk to your HOA about what approval processes or aesthetic guidelines you might need to follow.

What else can I do to prevent stormwater pollution?

Stormwater pollution can start at home. There are many easy ways residents can take action to prevent stormwater pollution. They center around only allowing rain or clean water to enter the road and flow into nearby storm drains. See KICP’s Resources for Residents webpage for more ideas and information.

  • Clean up pet waste
  • Use commercial car washes
  • Monitor your vehicle for leaks
  • Compost or mulch yard waste and leaves, keep it out of streets
  • Minimize pesticide use
  • Minimize fertilizer use: do a soil test, leave grass clippings, use compost or compost tea

What else can I do to prevent water runoff from my property?

As we have replaced permeable natural environments like forests and grasslands with the impermeable surfaces of houses, driveways, and roads, a lot of the water that used to soak directly into the ground now “runs off,” becoming runoff that enters the nearest storm drain or waterway. Learn more on the KICP’s Slow the Flow webpage.

Some projects and practices to prevent water runoff from your property and encourage it to go straight into the ground include:

  • Prioritizing vegetated landscaping and mulch and using permeable landscaping materials (materials with “breaks” in them instead of one long flat piece of concrete) like gravel and pavers.
  • Disconnecting downspouts by directing water from downspouts to vegetated areas.
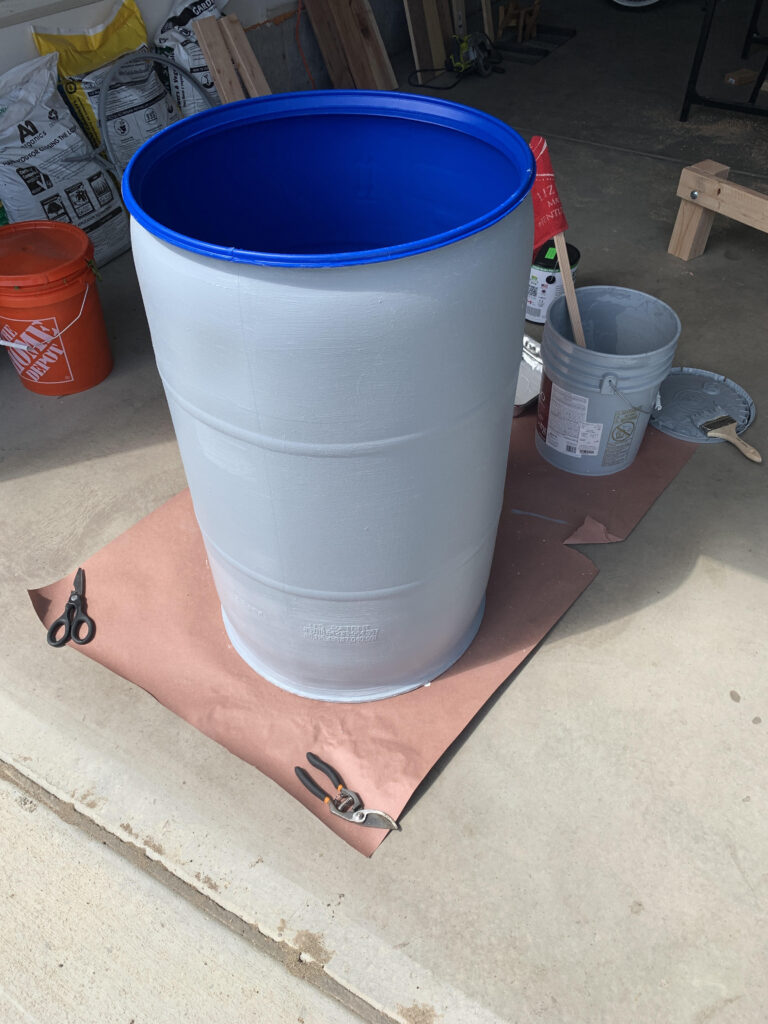
A 55-gallon barrel coated in gray paint being prepared to be turned into a rain barrel for collecting rainwater.

Rain Barrel Installation Guide

Thank you to the Colorado Stormwater Center for compiling the original rain barrel installation guide that the information on this webpage is based on – you can see all of their rain barrel information and resources on their website: Rain Barrels – Colorado Stormwater Center.

Colorado Rain Barrel Regulations

In 2016, Rainwater Harvesting was legalized for the very first time, but there are some restrictions:

  • Single-family residences and multi-family residences (4 or fewer units) can only install 2 barrels with a combined maximum storage of 110 gallons.
  • The water may only be used for outdoor purposes: watering lawns, plants or gardens. Users should evaluate the water before using it for other outdoor purposes such as car washing, livestock watering, etc.
  • Never use rainwater for drinking water, cooking, or other indoor household purposes. Rainwater is untreated and may contain contaminants that could harm you or your pets if ingested.
  • Containers must have a sealable lid to prevent mosquito breeding.

Learn more from the Colorado Division of Water Resources Rainwater, Storm Water & Graywater.

Getting Started

Before purchasing and installing your rain barrel, there are several considerations to keep in mind:

  • Rain barrels come in many different sizes. Maximize the amount of water you can store by planning for two 55-gallon barrels.
  • Check with your landlord or Home Owner’s Association (HOA) before you purchase your rain barrel as they may have aesthetic and/or location requirements. HOAs legally CANNOT prevent you from installing rain barrels.
  • Consider spigot placement and have a plan for overflow water. If your barrel has an overflow valve, direct it away from your house or flood-prone areas. Overflow water can be directed toward your lawn or garden.
  • Rain barrels need winterization just like a sprinkler system. Make a barrel storage plan for winter.

This installation guide walks you through how to build and install a rain barrel using a 55-gallon plastic barrel and diverter kit.


Supplies

Make sure you have all the necessary supplies before installation!

1. Rain barrel with sealable lid or cap

2. Diverter kit including:

  • Diverter
  • Fill hose
  • Fill hose seal
  • Threaded rubber spigot seal
  • Winterization cap
  • Hole saw kit
  • 2 stainless steel screws
  • Plastic full port spigot

3. Other tools and supplies

  • Drill
  • Gloves
  • Eye Protection
  • Level
  • Tape Measure
  • Pencil
  • Wrench

4. Decorating (if you are painting or decorating your barrel)

  • Sander and sand paper (100 weight)
  • Primer (plastic paint primer)
  • Exterior house paint and/or acrylic paint
  • Paint sealer (if using acrylic paint)

Where to Buy

These are locations we are aware of where you can buy, rent, or borrow these supplies in the Boulder County area.

Rain barrel with sealable lid or cap

Diverter kit

  • Colorado Rain Catcher (local)
    • DIY Rain Barrel Installation Kit
  • Blue Barrel (nationwide)
    • Tool and accessories – including the option to purchase individual or replacement parts that usually come as part of the full installation kit
    • Information and materials for their unique BlueBarrel Rainwater Catchment System, which is different from the installation process you will find on this page
  • EarthMinded Rain Barrels (nationwide)
    • Options for purchasing individual tools and accessories

Other tools and supplies

  • Borrow from a family member, friend, or neighbor
  • Post in a neighborhood group or online community group
  • Resource Central for affordable used tools
  • Check Home Depot or Lowe’s for tool rental options
  • Longmont residents can use the City of Longmont Library of Things

Decorating

Choosing a Rain Barrel

When choosing a rain barrel, there are some features you need to have, and some that you want to avoid or be cautious of.

Features to look for:

  • Removable, sealable/screw cap lid: Makes the barrel easier to clean and ensures pests cannot enter the enclosed barrel.
  • Spigot located 1-3” from bottom: You will not be able to reach any water below the spigot.
  • Thick plastic: A metal barrel would need to be painted with a plastic paint coating to prevent rust.
  • Divertor/overflow mechanism: Diverters will keep leaves and debris out of the barrel. Water needs to be able to safely overflow from the barrel when it is full – it should not back up into the gutter or spill too close to the house foundation.
  • Food-safe barrel: Beware buying barrels second hand from places like Craigslist and Facebook Marketplace that may have stored dangerous or unknown materials.

Features to avoid:

  • Open top/screen (will allow critters, bugs, mosquitos, and sunlight to enter the barrel – sunlight will encourage algae growth)
  • High spigots (cannot access water at bottom)
  • Metal (needs paint to avoid rusting)
  • Barrel of unknown origin
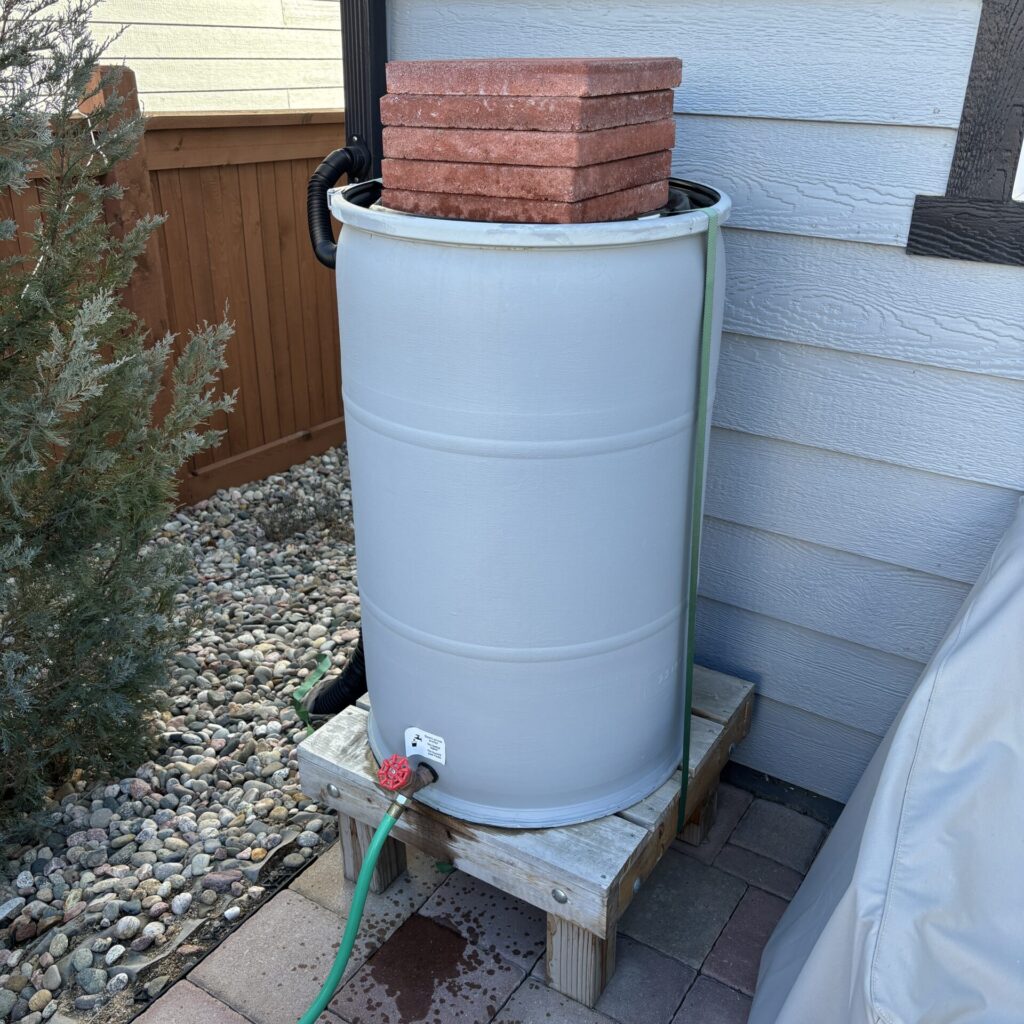
An installed rain barrel with several landscaping pavers set on top of it to weigh it down.

Rain Barrel Safety

Keep safety in mind at each step of the installation process and understand what precautions to take long-term to keep kids, pets, and property safe once your rain barrel is installed. Full rain barrels weigh nearly 500 pounds!

  • Supervise children and pets: Children must always be supervised around rain barrels – no one should climb, tip, or play with the rain barrel. Watch pets who may try to tip or climb the rain barrel.
  • Build a good base: An unstable rain barrel or one that can be tipped over can hurt people or surrounding property, or spill water too close to the foundation of the house. A flat, well-built, secure base ensures that your rain barrel stays upright.
  • Secure the rain barrel long-term: You may also need to secure your rain barrel to its base if it is an exposed area, or if you are storing it outdoors during the winter. Windy conditions can tip over empty or light, causing damage to the downspout it is attached to, the surrounding property, and the barrel itself.
    • Tip: Use straps, bricks, cinder blocks, or landscaping rock to weigh down your barrel if needed

Choose a Location

Consider the following when selecting a location for your rain barrel:

  • Locate the downspouts around your house. Pick a location based on the ease of making a level base and its proximity to where you need the water.
  • The area must be flat, at least 2 ft. x 2 ft., and within 3 feet of a downspout.
    • A 55-gallon barrel has a diameter of about 2 feet – you may need more space depending on your base and how you will access the spigot.
    • Installing less than 3 feet from the downspout is preferable to prevent the connection hose from drooping.

Installation Steps and Tips

This an overview of the installation steps for installing a rain barrel using a 55-gallon barrel and diverter installation kit. Check the instructions included with the kit in case they conflict with the advice on this page and always use personal protective equipment: safety glasses, gloves, long sleeves and pants, and closed toed shoes. Ensure you have all of the necessary supplies and tools, and review the installation kit instructions before starting.

1. Drill a Spigot Hole in the Barrel

Important Reminder: Compare these steps to the instructions in your rain barrel installation kit.

  1. Measure up 3 inches from the bottom of the barrel and make a mark with a pencil.
  2. Carefully drill the spigot hole, centered on the mark, using the SMALLEST hole saw.
  3. Immediately after drilling the hole, insert the gasket while the plastic is still warm. This should make insertion easier. Rub soap around the gasket edges to help insertion if necessary.
  4. The direction of the gasket does not matter.
  5. Make sure the spigot is CLOSED after installation. If the spigot is open, water will flow out of your rain barrel.

Tip: Sit on the barrel to give you more control.

2. Drill a Fill Hole and Connect Hose

Important Reminder: Finalize the location of your barrel BEFORE drilling these holes. The hole should be on the side of the barrel closest to the downspout.

  1. Measure down 3 inches from the top of the barrel and make a mark with a pencil.
  2. Assemble the MEDIUM hole saw according to your kit instructions.
  3. Carefully drill the hole, centered on the mark.
  4. Insert the medium rubber fitting.

3. Install the Diverter

Important Reminder: Always wear eye protection and gloves when drilling into metal.

  1. Place your barrel on the stand with the spigot facing out.
  2. Measure your downspout – always drill on the 3” side (your downspout could be 2”x3” or 3”x4”).
  3. Use a level to mark the downspout at the height of the intake hole.
  4. The tube MUST BE LEVEL with the intake hole to allow water to flow back out the downspout. If the diverter is too high on the downspout, excess water will flow out of the top of your barrel. If the diverter is too low, your barrel will not fill.
  5. Use the largest hole saw to drill into the 3” side of the downspout. Be careful not to drop the metal cutting into the downspout if your downspout is connected to a pipe that runs underground.

Tip: Use pressure when drilling and make sure you are holding the hole saw straight

Insert the diverter into the downspout:

  1. Squeeze the sides of the rubber diverter and insert it into the downspout. The cup and arrow should be facing UP to ensure rainwater capture.
  2. Secure the diverter to the downspout with the two small screws. Insert the fill tube into the diverter and the barrel’s top hole.
  3. Make sure the diverter is completely flush (no gaps) and completely inserted. You should hear a ‘pop’ when the diverter is inserted completely.

Once the diverter is in place, connect the other side of the hose into it. The hose should now be connecting the downspout to the barrel.

4. Test Your System

It is important to test your rain barrel system and check for leaks before you attempt to capture rainwater:

  • Using a hose, spray water on the roofline above the rain barrel.
  • Water should flow to the gutters, through the downspout, through your diverter, and into your rain barrel.
  • Double-check that your barrel is stable and not susceptible to falling over.
  • Always monitor children and pets around rain barrels.

Considerations for 2 Rain Barrels

You can install your rain barrels in different locations or connect the barrels to increase storage. Rain barrel connection kits are available from places like Colorado Rain Catcher for a few dollars.

The connector pipe must be level and located below the intake hole of the first barrel so that the second barrel fills first.

Ongoing Care and Maintenance

A rain barrel may collect and accumulate sediment and organic debris throughout its lifespan. Here are a few quick tips for proper rain barrel hygiene:

  • Use collected water within 7 days.
  • Empty, clean, and dry your barrel every year, or more often if possible/necessary.
  • Disconnect if leaving home for an extended time.
  • Downspout filter must be cleared of debris periodically.

Mosquitos

Keep insects, particularly mosquitoes, away from your rainwater harvesting system:

  • Ensure the barrel and all openings are properly covered.
  • Empty the barrel regularly.
  • Keep the top clear of standing/pooled water.
  • Use “Mosquito Dunks” in the barrel and on top if water is pooling there.
  • Use several tablespoons of vegetable oil to create a barrier at the water surface.

Algae Build Up

If not properly maintained, particularly in humid regions, your rain barrel may provide an ideal habitat for algae growth. This layer of algae growth on the interior of the barrel walls can settle at the bottom of the barrel, causing clogs and even harm to your irrigated landscape.  Thinking through the placement of your barrel and proper maintenance can help avoid some of these issues:

  • Place barrels out of direct sunlight.
  • Use opaque barrels or paint your barrel (so the walls shade the inside).
  • Keep gutters clean (nutrients can leach into your barrel from the roof runoff).
  • Clean the barrel regularly and use harvested water frequently.
  • Use vinegar or apple cider vinegar as a natural way to prevent algae in your rain barrel.

If you need extra assistance removing stubborn algae, use a diluted (2%) bleach solution. Dispose of this used bleach solution into an indoor sewer drain, not outdoors.

Cleaning Your Barrel

Cleaning your barrel is important for maintaining water quality and preventing algae blooms:

  1. Disconnect the barrel from your house.
  2. Rinse out the barrel with a hose.
  3. Use a long-handled scrubber.
  4. Add mild cleaning products:
    • 16 oz. box of baking soda and 64 fl. oz. distilled white vinegar.
    • Mild dish soap, castile soap, and/or phosphate-free soap.
  5. Turn the barrel on its side and swish vigorously, use a scrubber if possible.
  6. Rinse out the barrel with a hose.

Tip: Barrels with a fully removable lid are easier to clean. If you have the style of barrel with two small holes on top, it is important to stay on top of cleaning and maintenance since build up and algae will be more difficult to reach and scrub out of this style of barrel.

Winterization

Rain barrels are typically used between March and October in temperate climates. In warmer parts of the US, rain barrels can be used year-round. However, freezing temperatures can cause permanent damage to your system, particularly the diverter and spigot. Keep your rain harvesting system in good shape by following these easy winterization steps:

Barrel Storage

  1. Drain your system – let gravity slowly empty the barrel.
  2. Dry the barrel thoroughly.
  3. Remove diverter and overflow hose. The spigot should survive outdoor temperatures.
  4. Store your barrel:
    • Inverted in the garage or basement.
    • Resting upside-down on bricks or concrete blocks if storing outdoors.
    • In its usual location, as long as it is disconnected from the downspout and weighed down/secured to prevent it from falling.

Downspout

This step is critical if you cut your downspout to install your rain barrel! You will need to add a gutter extension to channel the water away from your house.  If your rain barrel uses a diverter such as the flexi-fit-diverter found in the RainRecycle rain barrel kit or the Earthminded DIY rain barrel kit, there is a winter hole cover provided. Simply install it and you are done. If you do not have a winter hole cover, you can order one from the www.rainbarreldepot.com.

Decorating Your Barrel

Rain barrels can be functional and look great! Painting the barrel may help meet aesthetic requirements. Remember to use a ground cover and never rinse paint brushes outside – keep soap and all paint out of out of landscaping and storm drains.

  1. Disconnect your barrel from the downspout (or decorate before installation – do not decorate while it is attached to your house).
  2. Use sandpaper (100 weight) on the outside of the barrel.
  3. Wipe down the barrel and allow it to dry.
  4. Spray or brush on plastic paint primer – paint will not stick without it.
  5. Use exterior house paint or acrylic paint. Create your own design or use cardboard stencils.
  6. Spray with a paint sealer if using acrylic paint.